
Your laptop makes the little chime that means something just connected. The light on the external hard drive comes on. Then File Explorer, or Finder if you're on a Mac, shows the same folders it always shows, and the drive that holds three years of photos, invoices and half-finished projects isn't among them. Your stomach drops, and your first instinct is to find the button that makes it come back.
Take a breath. An external hard drive not detected by your computer is a symptom, not a diagnosis, and most cases come from the path between the computer and the disk rather than from the disk itself dying that morning. The thing that reliably turns a fixable problem into an expensive one is doing things in the wrong order: formatting, initialising or running repair tools before you know which layer failed.
So the order matters. Find your symptom, test the path, read what the system reports, protect the files, and only then decide whether to recover, repair or retire the drive.
Table of Contents
- Match Your Symptom to the Right First Check
- How to Test the Cable, Port and Power Step by Step
- Read the Drive Status and Know When to Stop
- Protect Your Files Before Any Recovery Attempt
- Retiring a Failed Drive Safely in Singapore
- Pick the Safe Route for Your Drive Today
Match Your Symptom to the Right First Check
Drives don't usually fail in the dramatic way people fear. They get unplugged mid-write, shoved into a bag with the cable still attached, plugged into a dock that doesn't pass enough power, or handed a partition table the operating system can't read. Each of those leaves different fingerprints, and the fingerprints tell you what to do first.
The worst mistake at this stage is treating every disappearance the same and reaching for a format button. A Seagate USB external troubleshooter separates a drive that shows up as RAW or unallocated from one that is missing at the system information level, and recommends testing a different port, cable, computer, power outlet and adapter before concluding that the device is defective. Those two situations need completely different responses.
Find your row below before you touch a single setting.
| Symptom | Likely layer | Safe first step |
|---|---|---|
| No lights, no spin, no sound | Power or adapter fault | Check the adapter, the wall outlet and the drive power switch |
| Light on, but not in File Explorer or Finder | Missing drive letter or unsupported partition | Open Disk Management or Disk Utility and read the status |
| Shows as RAW or unallocated | Filesystem damage or unreadable volume | Do not initialise or format, move to the data protection steps |
| Clicks, disconnects or spins up and down | Mechanical or enclosure fault | Stop testing and protect the drive |
| Missing from both system tools | Cable, port, enclosure or internal disk | Swap the cable and port once, then escalate if still missing |
The single most useful distinction in that table is between a drive that appears with its correct capacity and one that doesn't appear at all. A drive that shows its proper size in a system tool is still talking to your computer, which means the conversation is about files and partitions. A drive that appears nowhere isn't talking, and the conversation is about hardware.
Read your row, then work through the checks for it. If your row says stop, stop, and don't test it "one more time to see".
How to Test the Cable, Port and Power Step by Step
Work through these in order and keep the drive unformatted the whole way. The sequence moves from the cheapest, least risky checks to the ones that tell you the most, so you get an answer without gambling with the files. The PDPC guide to data protection practices for ICT systems frames storage as something to protect and back up separately or offline, including on encrypted external hard disks, which is exactly why you diagnose before you repair.
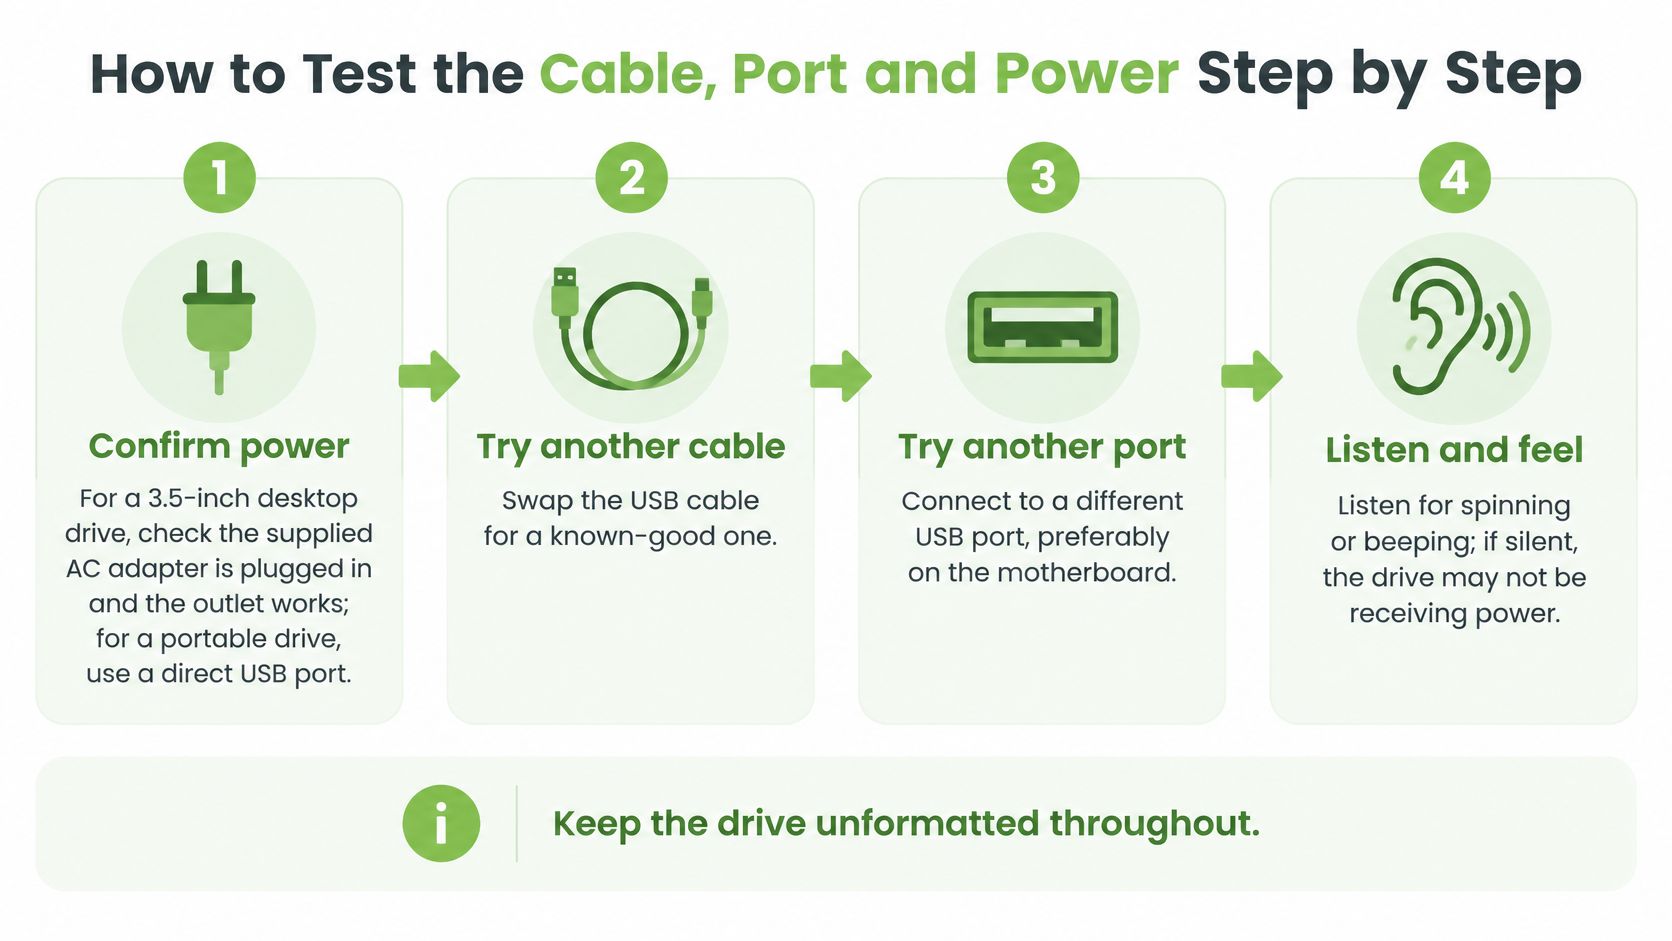
1. Confirm power before anything else. A 3.5-inch desktop drive needs its supplied AC adapter plugged into a working outlet and its own switch turned on. A 2.5-inch portable drive draws power from the USB port, so connect it directly to the laptop or to a rear port on a desktop rather than an unpowered hub, which often can't supply enough current to spin the disk up.
2. Swap the cable for one you know carries data. Singapore setups trip up most often here, because USB-C charging cables look identical to data cables and plenty of them carry power only. If your drive came with a short cable, use that one, and try a cable you've recently used to transfer files.
3. Try a different port. On a desktop, use a port on the rear panel, because front-panel ports are wired through extra internal connectors. Skip docks and multi-port adapters for this test, since they add another component that can fail.
4. Move the drive to a second computer. If it appears there, the first machine's port, dock or settings are the suspect. If it fails on both machines with two different cables, the drive or its enclosure moves to the top of the list.
5. Watch the light and listen. A steady indicator light with a soft spin-up and a quiet idle is a good result. A light that flickers while the drive spins up and down repeatedly is not, and that pattern means stop rather than plug it in again.
6. Check the system tools. On Windows, right-click Start and open Disk Management. On macOS, open Disk Utility from Applications and Utilities. Note the exact wording of whatever you see, because "unallocated", "RAW", "not initialised" and "no entry at all" point in different directions.
If the drive appears in Disk Utility but not in Finder, open Finder Settings, go to Sidebar, and tick External disks so it shows in the list. If Disk Utility flags it as unreadable, leave First Aid alone and move to protecting the data instead.
A healthy result looks like a light that stays on, a drive that mounts on its own, and files that open. Anything a service quotes you before it has seen the drive is a guess, because there is no reliable public dataset of success rates by fault type, and a number invented for a sales page tells you nothing about your disk.
Read the Drive Status and Know When to Stop
A drive that appears in a system tool but has no usable volume needs a different response from one that never appears at all. The first may have a partition or file-system problem; the second could involve the cable, power, enclosure, controller or drive itself. Identifying which layer is affected helps you avoid applying a software fix to a hardware fault.
Read What the System Tools Are Telling You
If the drive is listed in Device Manager or Disk Utility but has no usable volume, note the exact status and do not initialise it. The files may still be present even if the system cannot read their partition or file system.
If Disk Management shows the drive without a letter, assigning one may make it appear in File Explorer without formatting it. Try this only if the drive is otherwise behaving normally. If it reports errors or disconnects, stop instead.
If the drive is absent from the hardware list, software repairs are unlikely to help. The problem may be in the connection, enclosure or internal drive.
The Stop Signs That End the Test
Unplug the drive and leave it off if you notice:
- Unusual noise, such as clicking, grinding or beeping.
- Repeated spin-up and spin-down, or disconnections during a copy.
- A capacity far below the label, such as a 2 TB drive appearing as only a few megabytes.
- Physical warning signs, including a hot casing or a faint burnt smell.
- SMART warnings, repeated resets or read errors.
These clues help separate three possible fault areas. If a disk works normally in another enclosure, the enclosure or USB bridge may be at fault. If the drive reports the correct model and capacity but cannot open a volume, the issue may be logical corruption. SMART warnings, resets, unusual noises and read errors can point to a failing drive.
Treat these as practical clues, not a diagnosis. Deleted files may remain recoverable, as IMDA's guidance on protecting and disposing of data explains. For organisations, SS 714:2025 implementation guidance also calls for preventing the loss of storage media and ensuring disposed data cannot be recovered.
If the drive behaves normally, record its model, capacity and serial number before changing settings. Avoid repeated repair attempts if it shows any stop signs. For a drive that has stopped responding, read about data recovery for a failed hard drive before trying further fixes.
Protect Your Files Before Any Recovery Attempt
Say a freelance designer's 2 TB drive holds three years of client work, and the plan is to fix it over the weekend. The temptation is to keep poking at it until something opens. The smarter move is to accept that the drive is now a patient, not a workspace.
Backup habits don't guarantee safety. A 2020 survey of almost 3,000 respondents, including Singapore participants, found that 94% of individuals in Singapore backed up their data and devices, yet 60% still experienced data loss, and only 24% backed up daily, according to CyberSecAsia's report on the cyber protection survey. Check the date on your last backup before you rely on it, because a backup from three weeks ago won't bring back this week's work.

Get a target disk first. Find a healthy drive at least as large as the damaged one, and keep it empty. Without somewhere safe to put a copy, every other step is guesswork.
Clone before you explore. Make a sector-level clone of the failing drive and work only from the clone, so a crash during recovery costs you nothing. If the drive is already clicking or dropping offline, leave cloning to a lab with the right equipment.
Never write back to the source. Don't save recovered files onto the same drive, and don't accept an operating system repair prompt no matter how helpful it looks. Both write new data over the structure you're trying to read.
Power the original down and label it. Stick a note on the enclosure with the date and the symptoms you saw, so nobody in the house plugs it in "just to check".
Treat erasure as a separate job. Deleting files and emptying the bin doesn't remove them, so if the drive holds personal or client information, plan secure erasure as its own final step rather than assuming the files are gone.
Before any of that, jot down the files that matter: the client folder, the wedding photos, the tax archive. A written priority list keeps a recovery effort focused, and it's the first thing a specialist will ask you for. If you'd rather follow a fuller walkthrough, this guide to step by step data recovery from an external hard drive covers the sequence in more detail.
Retiring a Failed Drive Safely in Singapore
A drive that cannot be recovered may still hold readable personal or work data. Decide separately whether the files are needed and whether the data must be destroyed.
| Drive situation | Best route | Why |
|---|---|---|
| Detected, files matter | Recover before anything else | Formatting or repeated repair attempts make recovery harder |
| Failed, files still matter | Specialist diagnostics and recovery | A clone or lab work protects what remains on the disk |
| Failed, data no longer needed | Licensed e-waste channel | Data must be erased or destroyed before the device is recycled |
| Failed, personal or work data | Documented destruction with evidence | A record shows the data was handled securely |
| Working but unwanted | Erase data, then donate or recycle | Wiping first protects personal information before handover |
If the files matter, recovery comes before recycling. Once you no longer need the data, Singapore has designated e-waste recycling points for portable hard disks.
The National Environment Agency lists portable hard disks among items accepted at designated e-waste recycling bins, alongside thumb drives, printed circuit boards and SD cards. The bins have an opening of 450 mm by 150 mm, and bulky items should not be left outside, according to the NEA e-waste recycling locations guide.
Singapore's Resource Sustainability (E-waste Recyclers) Regulations require licensed recyclers to permanently erase or destroy data on data-bearing devices before reuse, recycling, disposal or transfer. Failing to meet this requirement without reasonable excuse is an offence. The Singapore Government ICT&SS control catalogue sets out controls for storage headed for retirement.
For a work laptop or a drive holding client records, ask for documented destruction before handing it over. The guide to secure data destruction explains what to consider.
Pick the Safe Route for Your Drive Today
If the drive still spins normally and makes no unusual sounds, the cable, port and computer checks may help narrow the cause. Clicking, repeated spin-ups or sudden disconnections are reasons to stop testing and protect the data first. A failed drive may be beyond recovery, and repeated attempts can put files at further risk.
If you are unsure what the symptoms mean, share what the drive is doing with myhalo's repair team. For more on the options, read this guide to data recovery services and tools.
A few details can make it easier to find the right next step: whether the light comes on, whether you hear clicking or repeated spin-ups, the drive's model and capacity, whether a second computer detects it, and the exact message Windows or macOS displays. myhalo offers Data Recovery, Repair & Rescue and e-Xtender Subscription as additional repair services. The team adheres strictly to ISO-certified data management processes when handling customers' devices.
You can tell myhalo what is happening, or bring the drive to a counter at Bugis Junction or Sim Lim Square for help finding the right solution. If the files matter, avoid formatting or repeated connection attempts until you understand the risk. Visit myhalo to get started.